

.jpg)


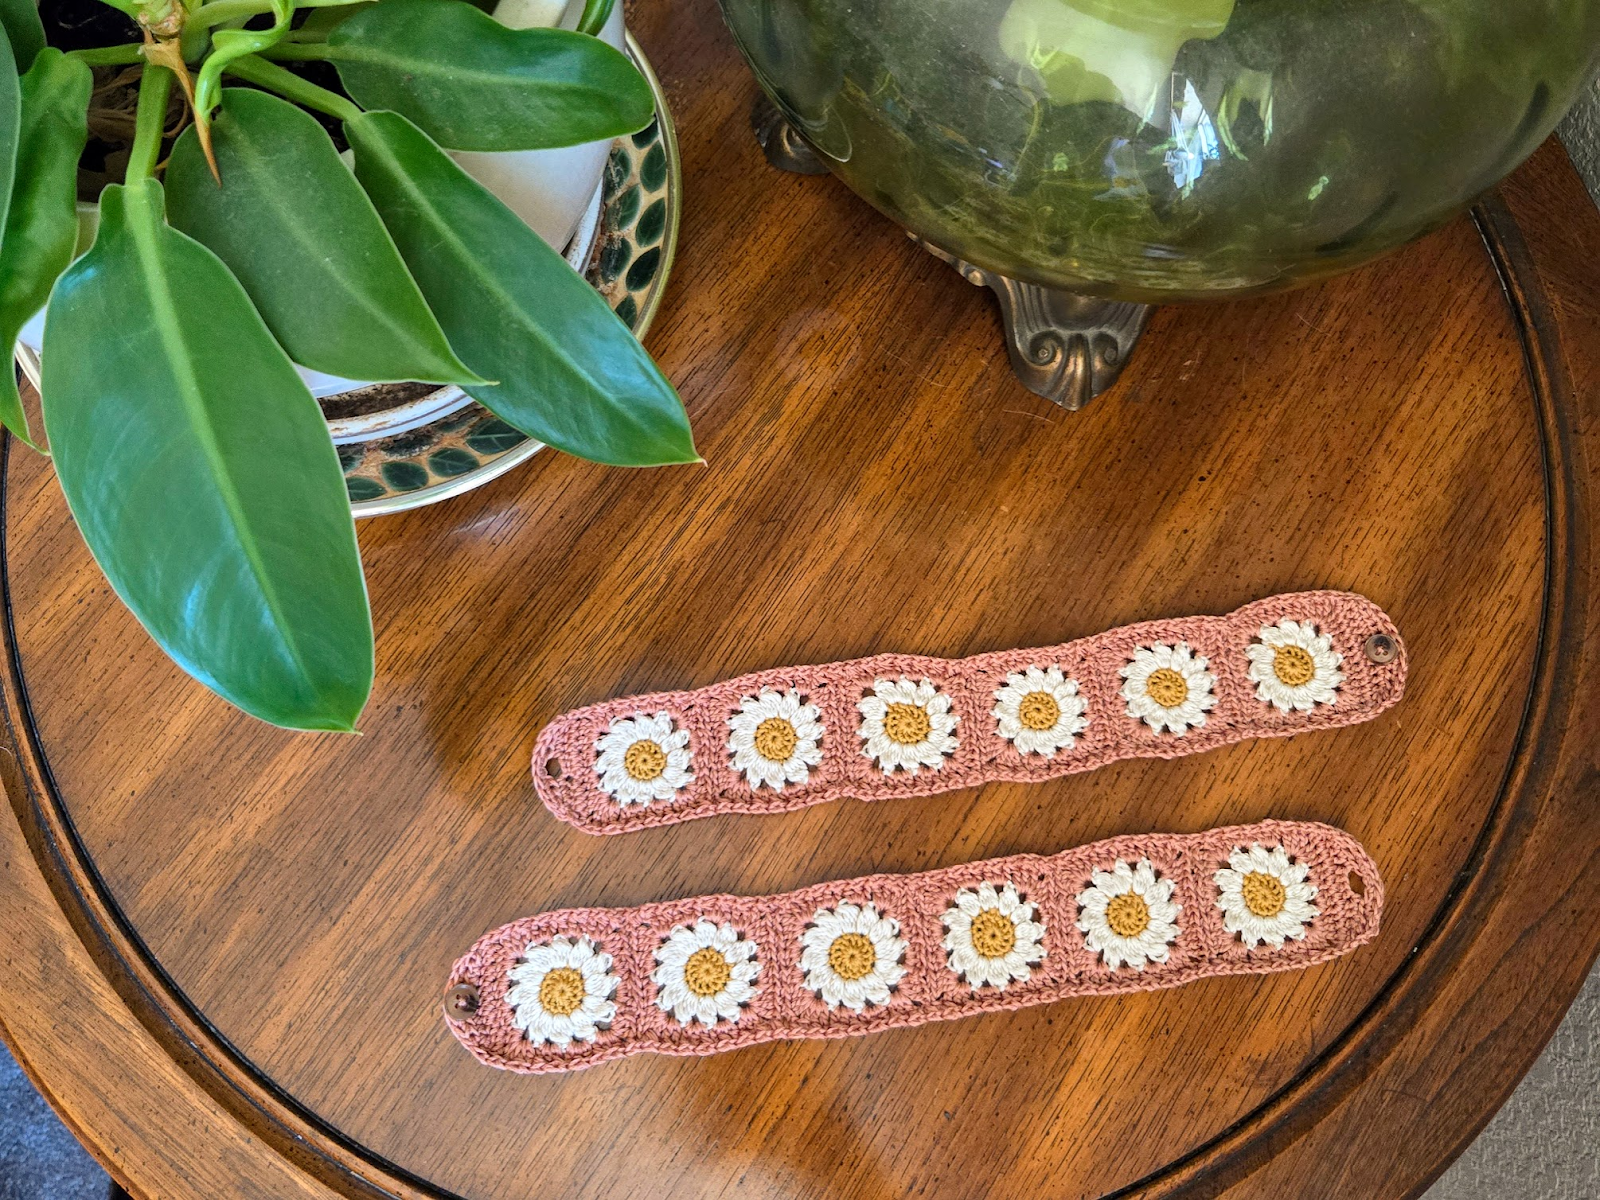
Looking for a quick crochet project that will brighten up your room? These daisy crochet curtain ties are made with embroidery floss, giving them a delicate and lacy look. Curtain ties are a perfect beginner crochet project for those looking for a great last minute handmade gift idea or simply hoping to add a pop of color to their own space. Let’s get started!
These curtain ties are made using a crochet daisy motif which incorporates the cluster stitch. The pattern will walk you through every step from crafting each row of the squares, to sewing them together and adding buttons to complete your curtain ties. The most exciting part is we will be using embroidery floss, which is inexpensive, though you could also substitute for fine yarn.
Prefer to have a downloadable version with additional photos and tips, all in one concise pdf? You can find the pattern here on my etsy for purchase, and it will be yours forever. While you’re there, make sure to check out the other curtain tie and home decor patterns in my shop!

DMC 8.7yd 6-strand embroidery floss, in three colors. I used 7 skeins pink (border color), 5 white (petals), and 2 gold (center).
If you prefer to use yarn to crochet your curtain ties, super fine or fine yarn should substitute well. Just keep in mind this will affect the final size and outcome of your curtain ties.
Hook:
2.5mm crochet hook.
You’ll also need:

Crochet pattern difficulty: advanced beginner.
Must be able to crochet squares and join them together. Your squares will be sewn together through the back loops only.
Made using DMC embroidery floss which may be difficult for some due to the small size.
I would recommend that you measure around the curtains you are planning to use to see how long your ties need to be.
Make sure you weave in your ends as you go! This will make it much more enjoyable in the long run.
The “petals” of your daisies will be made using the cluster stitch. Specifically, a 4dccl (4 double crochet cluster stitch). See below for the pattern specific instructions, and check here for a more in depth tutorial if you find yourself struggling with the stitch: How To Crochet A Cluster Stitch.

yo, insert hook in st, yo, pull up a loop and pull through first 2 loops only

repeat step one four times until there are 5 loops on hook

yo, pull through all 5 loops on hook

Begin with a magic circle using gold
ch1, 12 sc into circle
pull tight & slst to join
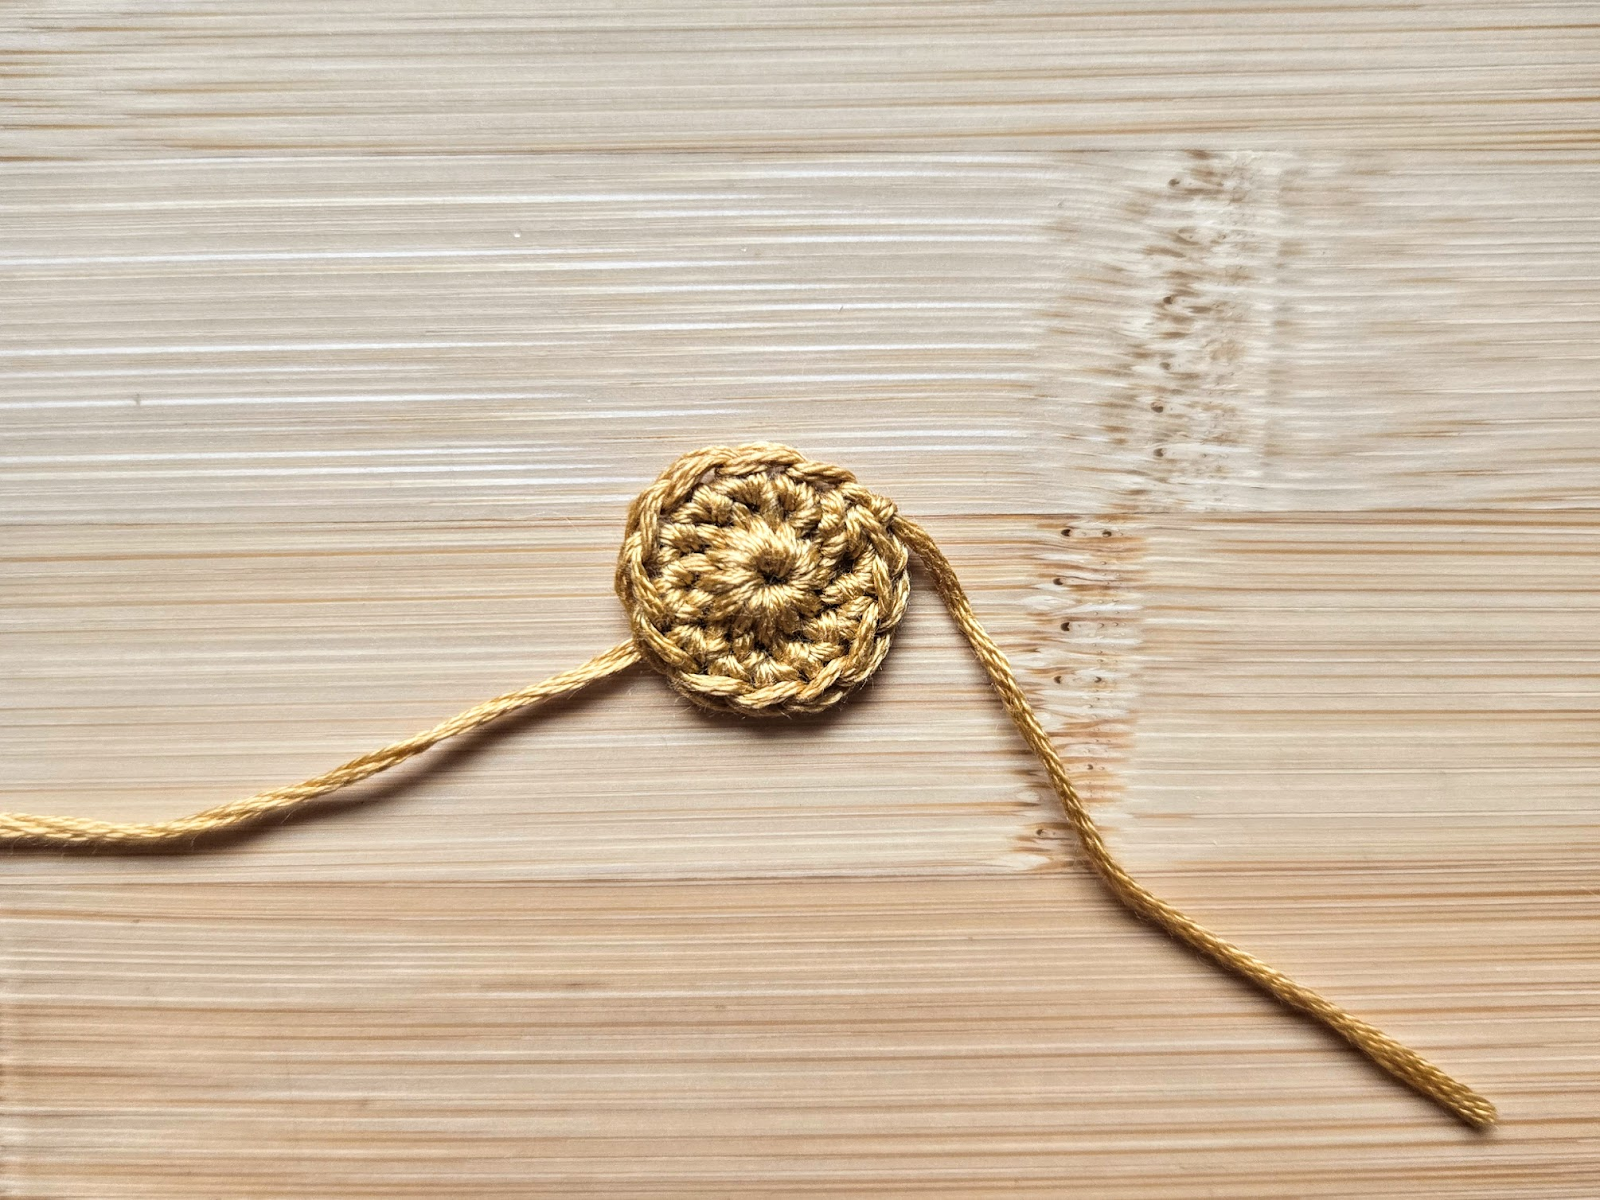
ch1, sc in each st around
slst to join & fasten off
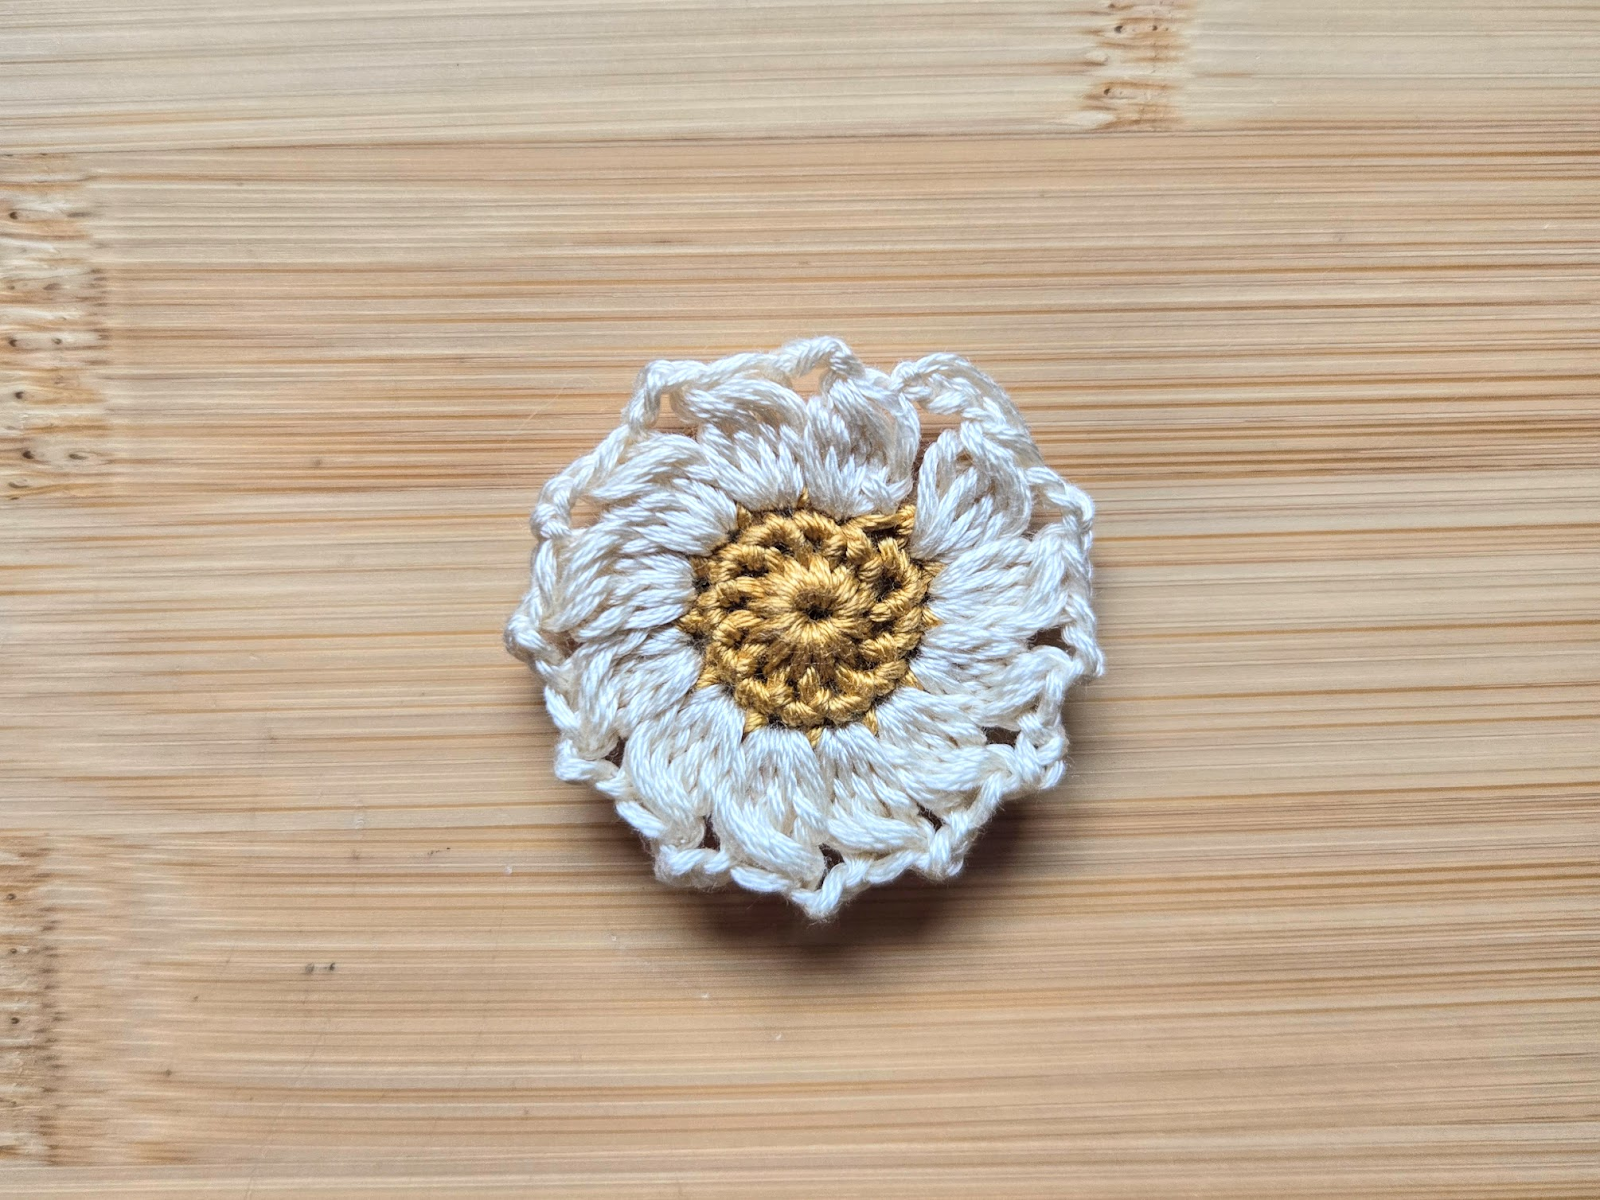
attach white thread in any st, ch1
Petal (cluster stitch, see above for instructions) in same st, ch3
Petal (cluster stitch) + ch3 in each remaining st, (for a total of 12 petals)
slst to join & fasten off

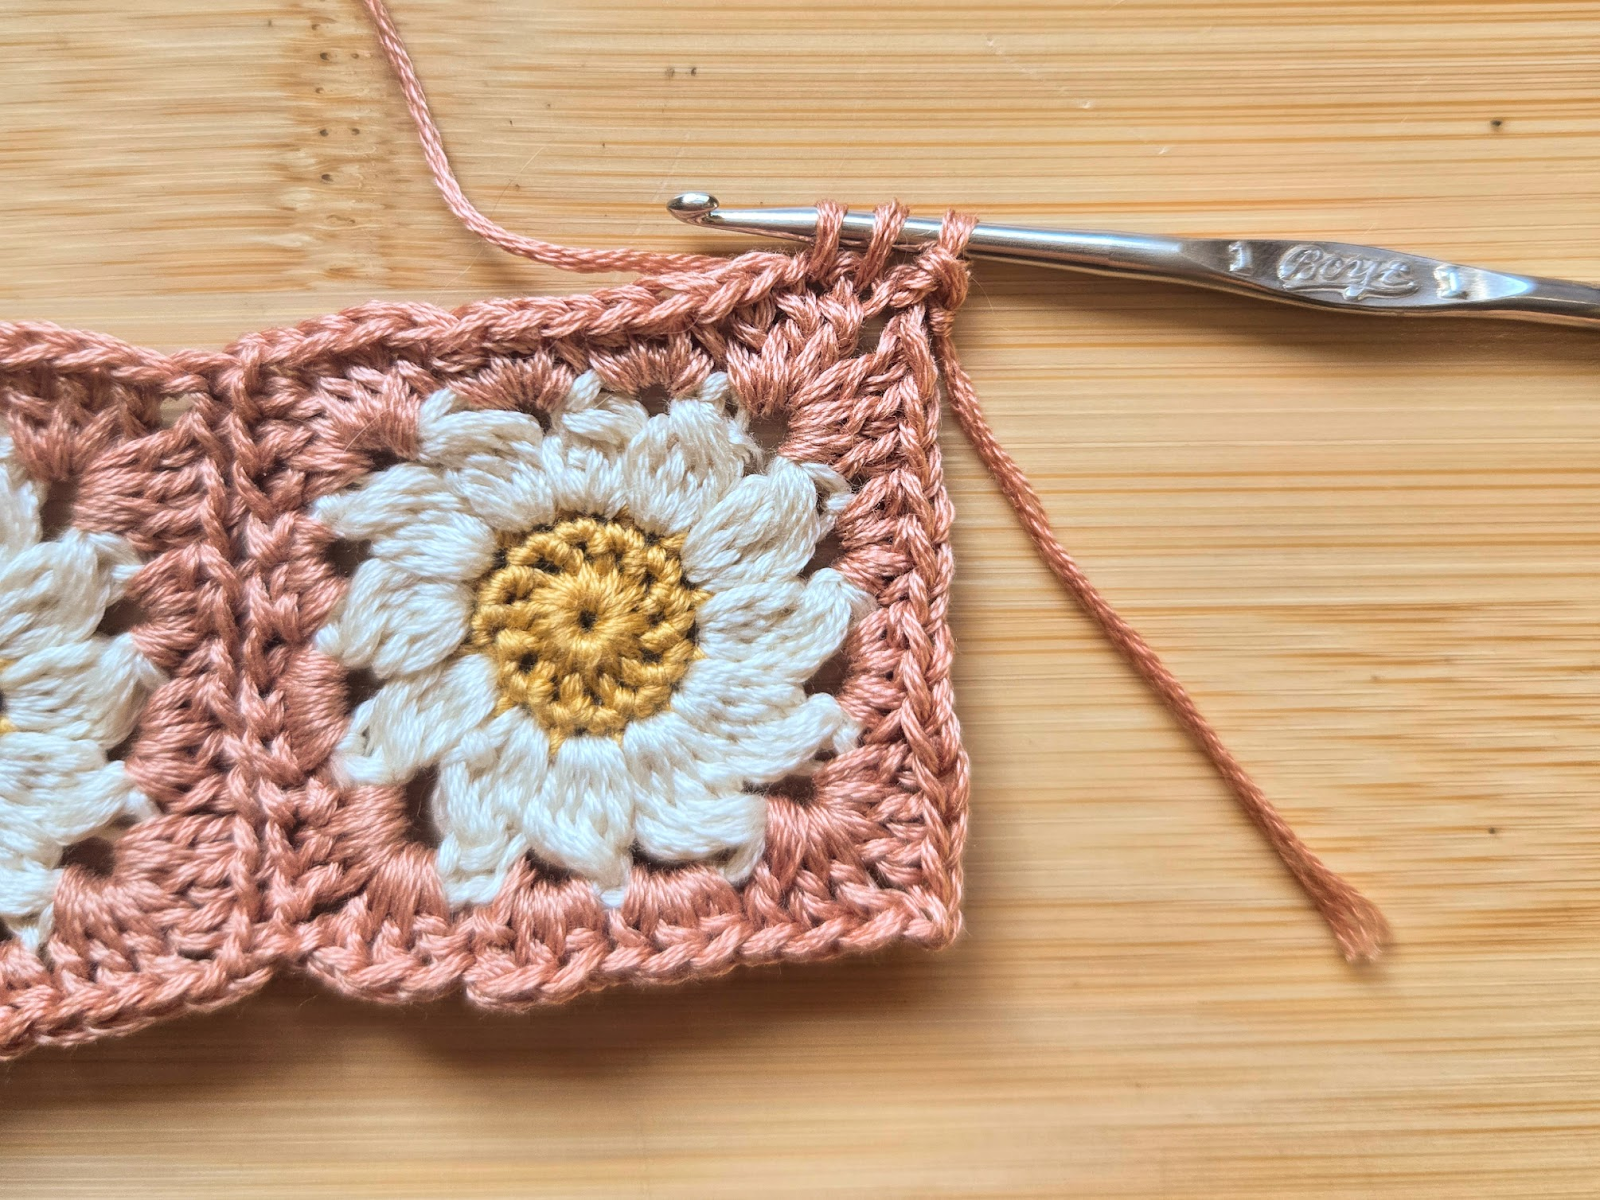
attach pink thread in any ch sp, ch1
*3hdc (in same sp for first instance only), 3hdc in next sp
3dc + ch2 + 3dc in next sp
repeat from * 3 more times
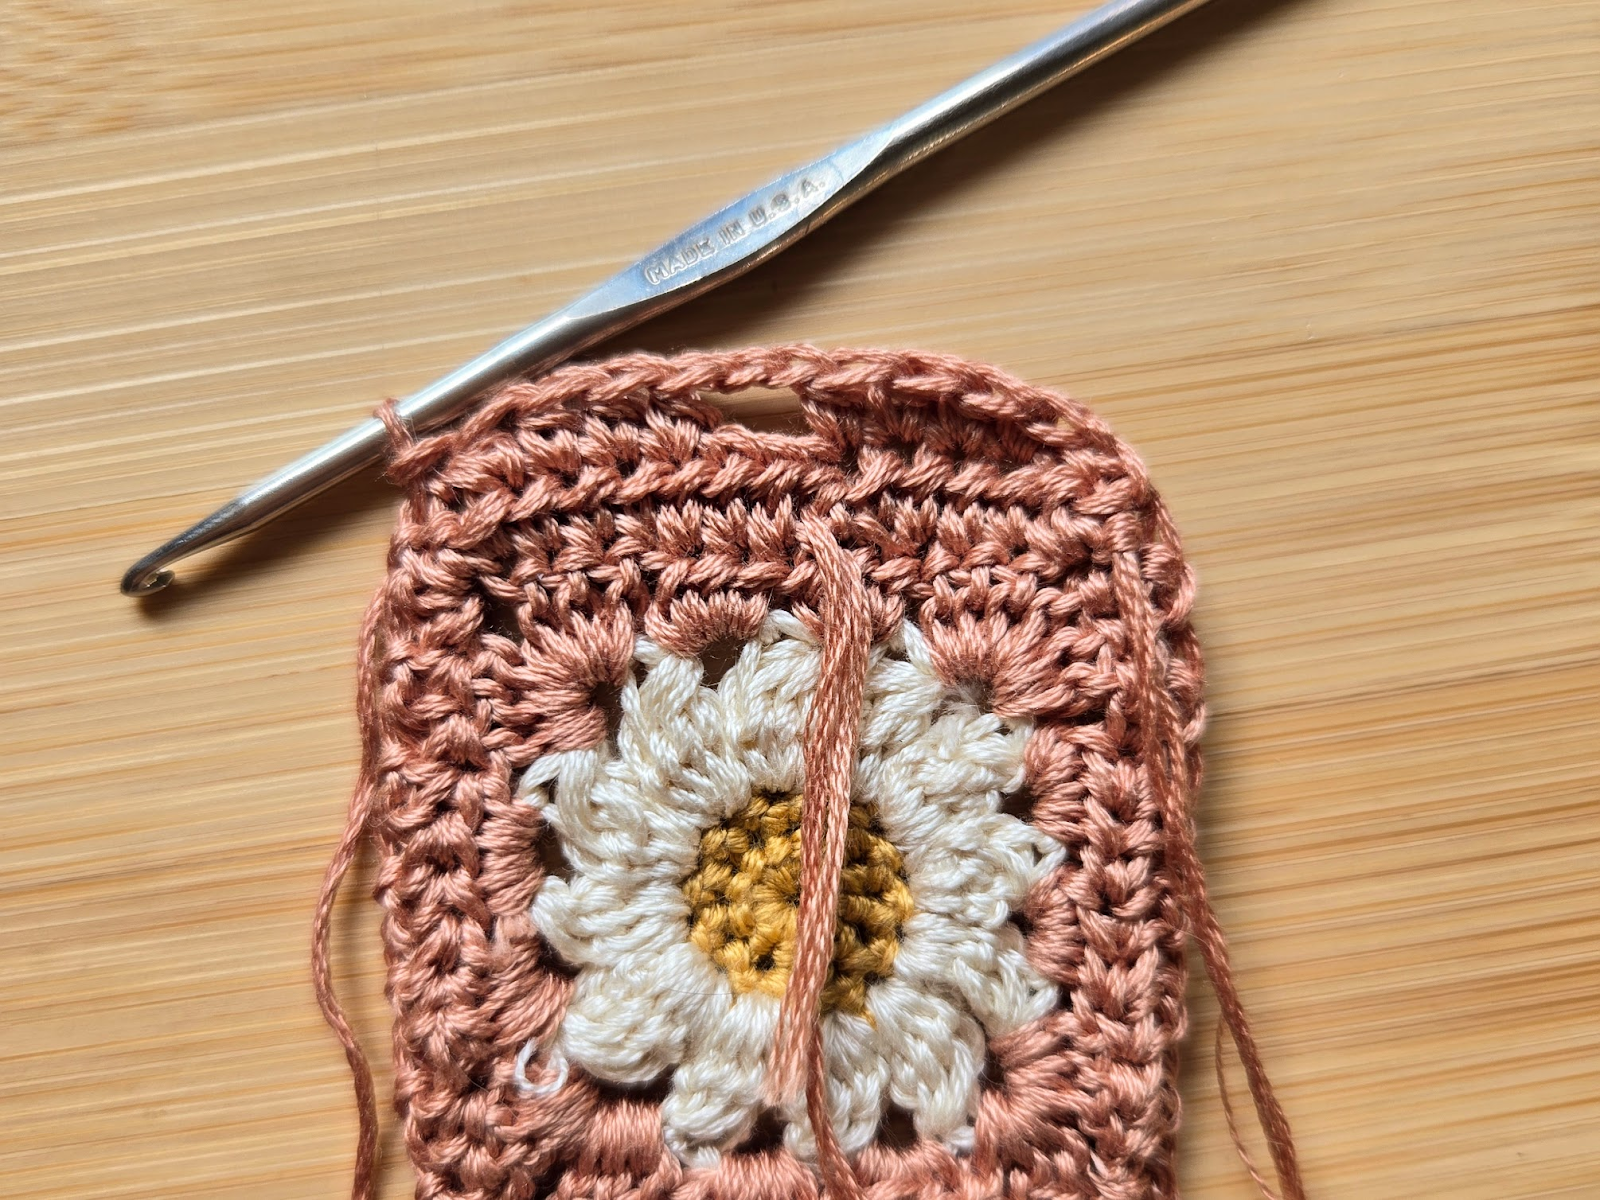
At this point, make sure to weave in all your ends and block your squares. You can purchase a blocking stand or mat specifically for blocking granny squares, or you can simply use a towel and some pins, pinning your squares to the towel, wetting them, and leaving them to dry. This is the method I prefer, because you have more control over the sizing.

Once dry, sew squares together by pressing the fronts of two squares together, lining up the stitches, and using your tapestry needle to sew through the back loops (outer loops) only.

This provides a basically invisible seam on the front of the ties.

Sew squares together in two sets of six.
Once all the squares are seamed together, weave in those ends and you are ready to add the border!
begin by attaching pink floss to the top corner of one end, then sc2tog.
ch1, then repeat sc2tog + ch1 across the entire side. make sure to crochet nice and loose to avoid puckering.

*this will be the end that the button will be sewn onto later.
once you reach the next end, hdc in corner sp, then hdc in each st until next corner.


Turn your work, ch1, skip first st
hdc until 2 sts left
skip next st, slst into last st

repeat previous step, then slst into next two sts

sc2tog + ch1 across entire long side until you reach the next corner

*this will be the end with the buttonhole.
hdc across end again, slst into first st

turn, ch1, skip first st,
hdc four times, ch2,
skip 3 sts, hdc four times
skip next st, slst into last st
turn, ch1, skip first st
hdc until 2 sts left
skip next st, slst into last st
fasten off

Once this border is completed, weave in your ends and repeat the process with your other curtain tie!
You will sew a button onto one end of each tie using one strand of the embroidery floss as thread.


When wrapping the ties around your curtains, pull the button through the buttonhole you have made on the other end.
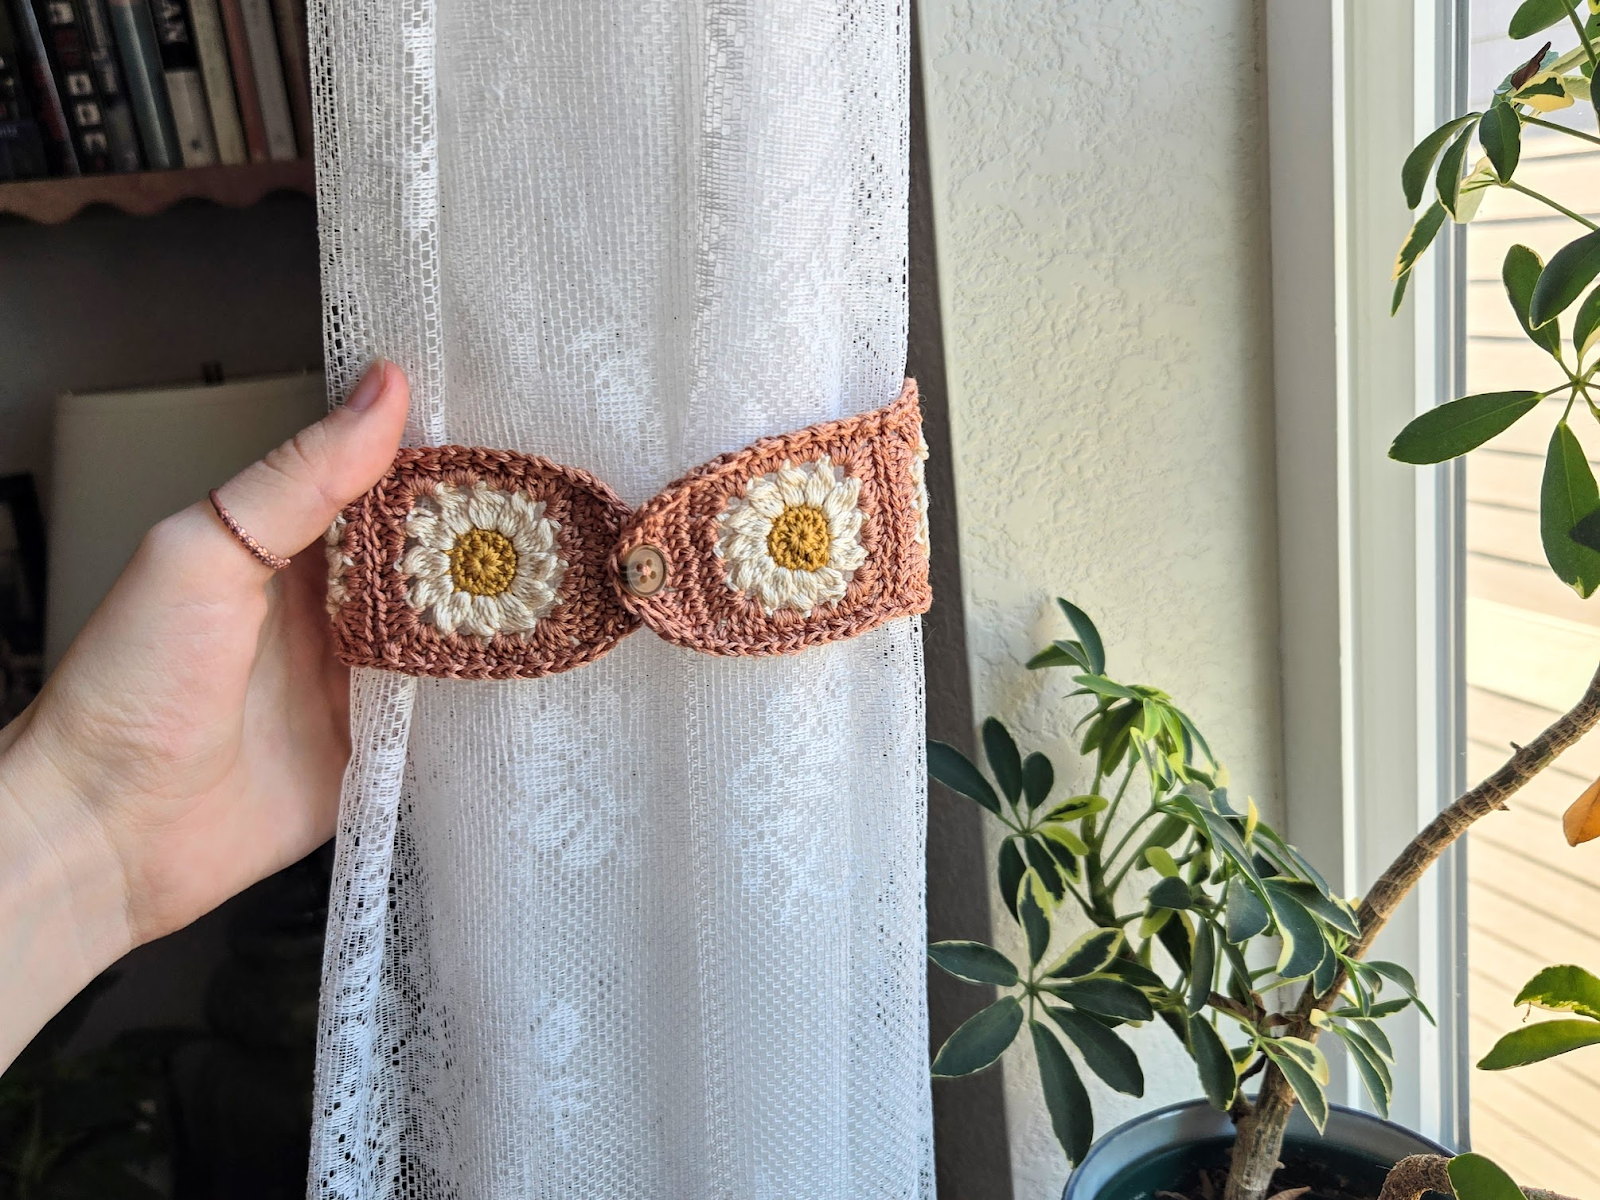
And there you have it, your daisy curtain ties are complete!! I would love to be tagged in photos of your finished projects and connect with you on instagram @ simpledreams.crochet!
Prefer to download this pattern to take on the go? You can find the pattern here on my etsy for purchase, and it will be yours forever! The purchased version is a concise five page pdf with additional photos and tips. While you’re there, make sure to check out the other curtain tie and home decor patterns in my store! Buy more than one pattern to save 25%!
Love this pattern for daisy curtain ties? I have many more curtain tie patterns including basic granny square, sunshine, and hexagon curtain ties, all available on my etsy! Choose the style that suits you best, or make some quick last minute handmade gifts.

Enjoyed this pattern? You may enjoy the free pattern for granny square curtain ties as well!
Check out the patterns page on my website for more free pattern tutorials, or my etsy for a complete listing of patterns.

Looking for more crochet tips and tutorials? Follow the quick links below for other beginner stitches or head straight to the full techniques page of my website!