

How to Crochet Two Stitches Together: A Step-by-Step Guide for Beginners
Are you looking to refine your crochet techniques? Crocheting two stitches together is a fundamental method used to decrease the number of stitches in a row, or to create shaping in garments, amigurumi, and other projects. This tutorial will walk you through four different techniques of crocheting two stitches together: single crochet, half double crochet, double crochet, and treble crochet. Let’s get started!
Crocheting two stitches together - also referred to as decreasing (abbreviation dec) is a technique used to reduce the number of stitches in a row. This method is commonly used to shape projects like hats, sweaters, and amigurumi, ensuring a smooth and tapered finish, though it can also be used as a stylistic choice in borders and details for garments, blankets and other projects. Any of the basic stitches can be utilized to crochet two together.
To get started, you’ll need the following:
If you need a refresher on the single crochet stitch, I recommend following this tutorial prior to attempting to crochet two of these stitches together: How to Do A Single Crochet.
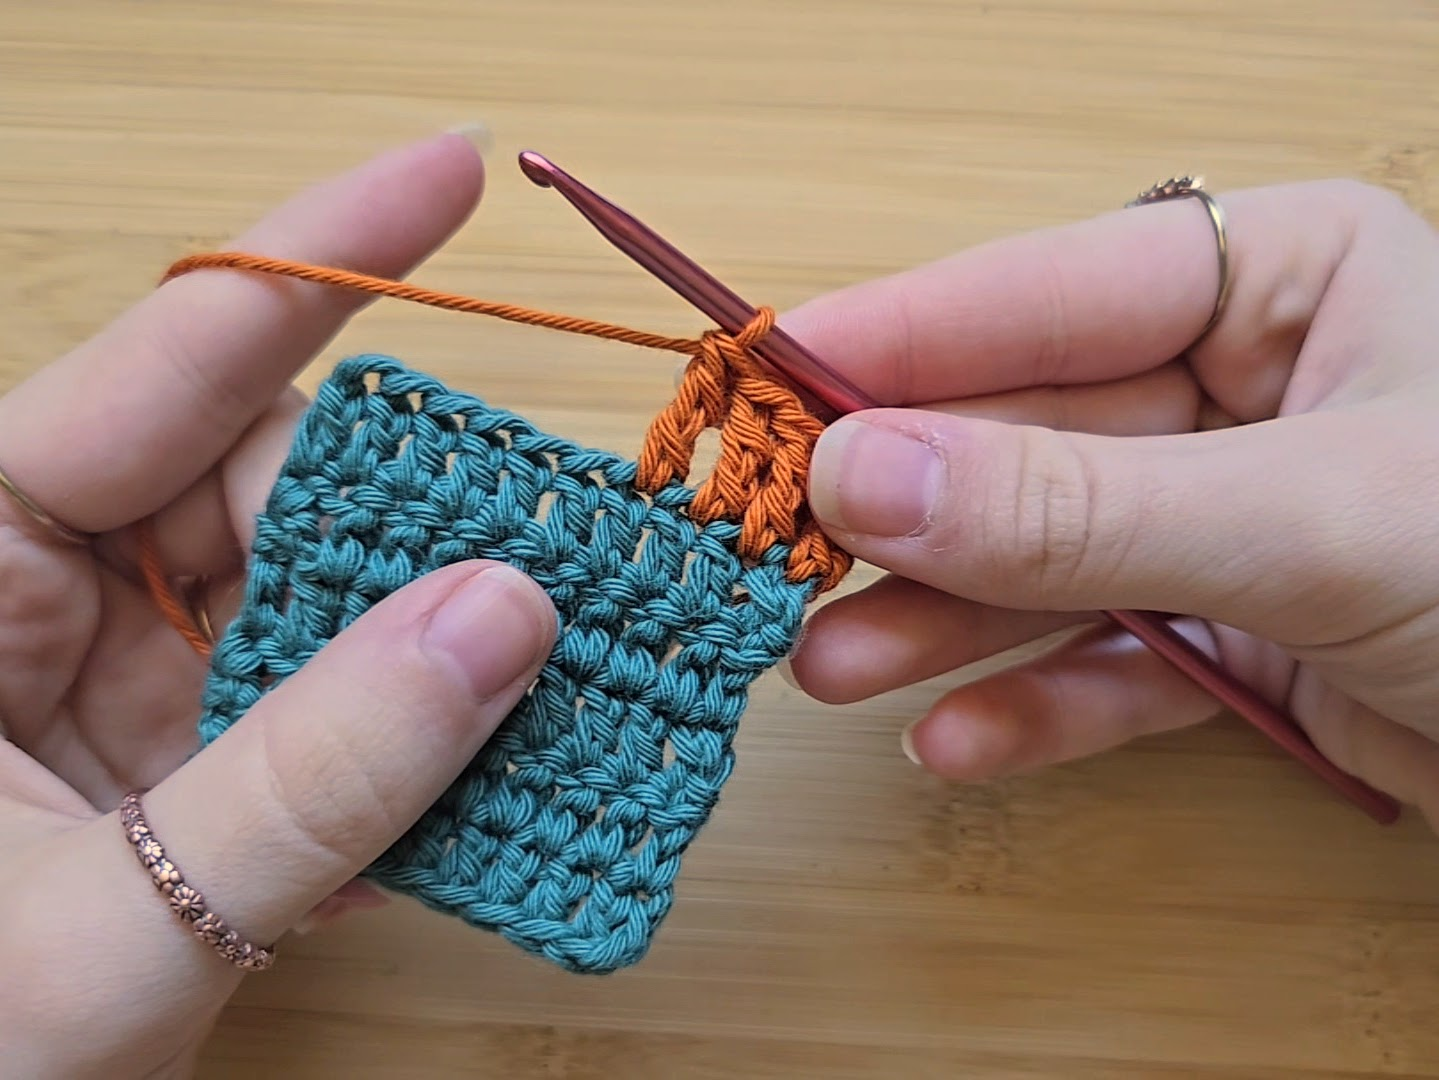
For the purposes of comparison, I recommend crocheting some “normal” stitches before crocheting two together, as this is usually what occurs in a pattern. I have attached my yarn to a small crocheted square and crocheted four single crochet stitches.

Start by inserting your hook into the next stitch as if you were going to make a normal stitch.

Yarn over and pull up a loop. You should now have two loops on your hook.

Without completing the first stitch, insert your hook into the next stitch and pull up a second loop. You should now have three loops on your hook.

Yarn over one last time and pull through all three loops on your hook. You have now successfully crocheted two single crochet stitches together into one!


Repeat the process as needed according to your pattern. For the tutorial, I have added a chain 1 after each completed decrease stitch to increase spacing, which is a great technique to use in borders. I use this technique in the border of my daisy curtain ties pattern.

If you need a refresher on the half double crochet stitch, I recommend following this tutorial prior to attempting to crochet two of these stitches together: How to Do A Half Double Crochet.
For the purposes of comparison, I recommend crocheting some “normal” stitches before crocheting two together, as this is usually what occurs in a pattern. I have attached my yarn to a small crocheted square and crocheted four half double crochet stitches.

Start by yarning over and inserting your hook into the next stitch as if you were going to make a normal stitch. Yarn over again and pull up a loop. You should now have three loops on your hook.

Without completing the first stitch, repeat the process from step 2 in your next stitch. You should now have five loops on your hook. Make sure to keep your tension even.

Yarn over one last time and pull through all five loops on your hook. You have now successfully crocheted two half double crochet stitches together into one!


Repeat the process as needed according to your pattern. For the tutorial, I have added a chain 1 after each completed decrease stitch to increase spacing, which is a great technique to use in borders. I use this technique to decrease in the corners of the border in my celestial cat cardigan and diamond stitch cat sweater patterns!

If you need a refresher on the double crochet stitch, I recommend following this tutorial prior to attempting to crochet two of these stitches together: How to Do A Double Crochet.
For the purposes of comparison, I recommend crocheting some “normal” stitches before crocheting two together, as this is usually what occurs in a pattern. I have attached my yarn to a small crocheted square and crocheted four double crochet stitches.

Start by yarning over and inserting your hook into the next stitch as if you were going to make a normal stitch. Yarn over again and pull up a loop. You should now have three loops on your hook.

Yarn over and pull through the first two stitches on your hook as if you are doing a double crochet. There will now be two stitches on your hook.

Without completing the first stitch, repeat the process from step 2 and 3 in your next stitch. You should now have three loops on your hook. Make sure to keep your tension even.

Yarn over one last time and pull through all three loops on your hook. You have now successfully crocheted two double crochet stitches together into one!

Repeat the process as needed according to your pattern. For the tutorial, I have added a chain 1 after each completed decrease stitch to increase spacing, which is a great technique to use in borders.

If you need a refresher on the treble crochet stitch, I recommend following this tutorial prior to attempting to crochet two of these stitches together: How to Do A Treble Crochet.
For the purposes of comparison, I recommend crocheting some “normal” stitches before crocheting two together, as this is usually what occurs in a pattern. I have attached my yarn to a small crocheted square and crocheted four treble crochet stitches.
Start by yarning over twice and inserting your hook into the next stitch as if you were going to make a normal stitch. Yarn over again and pull up a loop. You should now have four loops on your hook.

Yarn over and pull through the first two stitches on your hook, then yarn over and pull through the next two stitches. There will now be two stitches on your hook.

Without completing the first stitch, repeat the process from step 2 and 3 in your next stitch. You should now have three loops on your hook. Make sure to keep your tension even.

Yarn over one last time and pull through all three loops on your hook. You have now successfully crocheted two treble crochet stitches together into one!

Repeat the process as needed according to your pattern. For the tutorial, I have added a chain 1 after each completed decrease stitch to increase spacing, which is a great technique to use in borders. I use this technique as the sun rays in my sunshine curtain ties and celestial cat cardigan patterns!

Now that you know how to crochet two stitches together, you can confidently shape your crochet projects with precision. Whether you’re working on garments, amigurumi, or accessories, this technique is essential for achieving the perfect fit. Happy crocheting!

Looking for more crochet tips and tutorials? Follow the quick links below for other beginner stitches or head straight to the full techniques page of my website!
How to Crochet a Cluster Stitch
How to Do a Stacked Single Crochet


